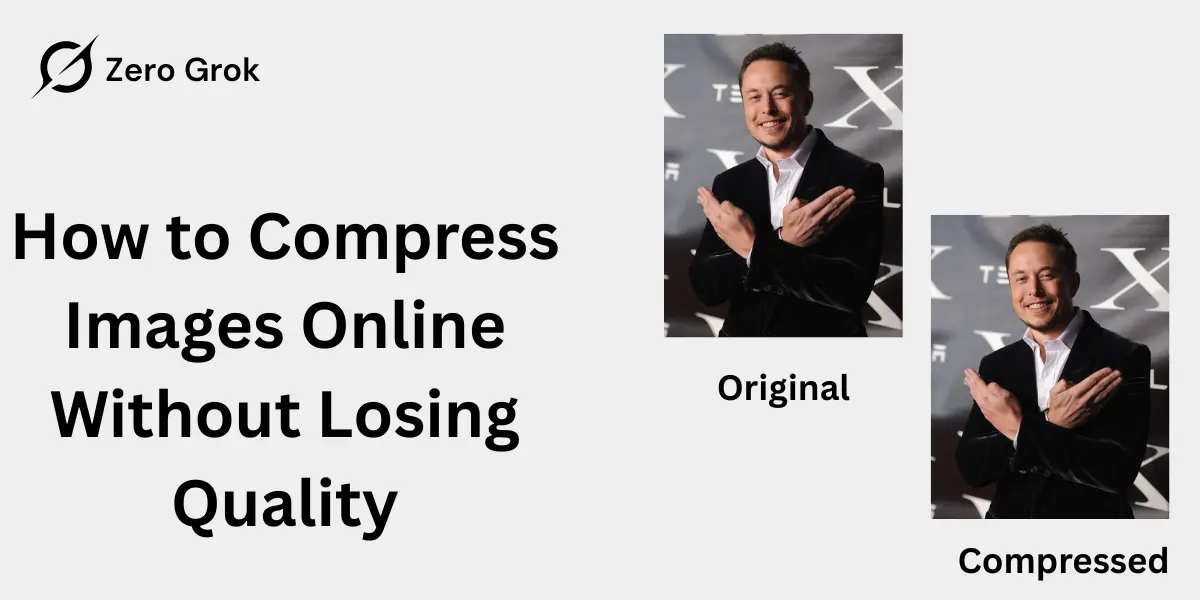
How to Compress Images Online Without Losing Quality: Complete Guide 2026
In today’s digital landscape, image compression has become essential for website owners, bloggers, photographers, and anyone who regularly works with digital images. Large image files slow down websites, consume storage space, and create frustrating user experiences. This comprehensive guide will show you exactly how to compress images online without losing quality, explore the best tools available, and help you understand the science behind image optimization.
Understanding Image Compression: The Foundation
What is Image Compression?
Image compression reduces digital image file sizes while maintaining visual quality by removing unnecessary data. Modern algorithms intelligently analyze images to optimize data removal, resulting in smaller, quicker-loading files that retain sharpness and professionalism.
Why Compress Images?
Website Performance Large, uncompressed images are the primary culprit behind slow-loading websites. Studies show that 53% of mobile users abandon sites that take longer than three seconds to load. Compressed images dramatically improve page load speed, keeping visitors engaged.
Improved SEO Rankings Google’s Core Web Vitals consider page speed as a critical ranking factor. Websites with optimized images rank higher in search results, receive more organic traffic, and enjoy better visibility. Image compression directly impacts your SEO performance.
Reduced Storage Costs Whether you’re using cloud storage, web hosting services, or local drives, storage space costs money. Compressed images occupy less space, reducing hosting fees and freeing up valuable storage for other content.
Better User Experience Fast-loading images create smooth browsing experiences across all devices. Mobile users, especially those on limited data plans, appreciate optimized images that load quickly without consuming excessive bandwidth.
Faster Email Attachments Email services limit attachment sizes. Compressed images allow you to share multiple high-quality photos without exceeding size restrictions or facing rejection messages.
Lossy vs Lossless Compression: Understanding the Difference
Lossy Compression Explained
Lossy compression reduces file size by permanently removing certain image data that the human eye typically doesn’t notice. This method achieves significant file size reductions—often 50-90% while maintaining good visual quality.
How Lossy Compression Works:
- Algorithm analyzes the image for redundant information
- Permanently removes non-essential data based on human perception
- Encodes remaining information more efficiently
- Creates a compressed file that cannot be restored to original quality
Popular Lossy Formats:
- JPEG/JPG: The most widely used format for photographs and complex images
- WebP: Google’s modern format offering superior compression with good quality
- AVIF: Next-generation format with excellent compression efficiency
When to Use Lossy Compression:
- Website images and blog posts
- Social media photos
- Email attachments
- Product thumbnails
- Marketing materials
- Background images
- Any scenario prioritizing file size over perfect quality
Lossless Compression Explained
Lossless compression reduces file size without removing any image data. The original image can be perfectly reconstructed from the compressed file, making it ideal when quality is non-negotiable.
How Lossless Compression Works:
- Identifies patterns and repetitive data in the image
- Encodes information more efficiently using algorithms
- Removes unnecessary metadata automatically added by cameras
- Allows perfect reconstruction of original data
Popular Lossless Formats:
- PNG: Ideal for graphics, logos, and images with transparency
- GIF: Best for simple animations and graphics with limited colors
- TIFF: Professional format for archiving and high-quality prints
- BMP: Uncompressed format preserving maximum quality
- RAW: Camera formats preserving all sensor data
When to Use Lossless Compression:
- Photography portfolios
- Professional prints
- Detailed product images
- Medical imaging
- Technical diagrams
- Logos and branding materials
- Images requiring future editing
- Archival purposes
Best Online Image Compression Tools in 2026
ZeroGrok Image Compressor
Website: zerogrok.com
Overview
ZeroGrok is a powerful online image compression tool designed to reduce file size while maintaining excellent visual quality. It supports modern formats and focuses on improving website speed and SEO performance.
Ideal for bloggers, developers, e-commerce stores, and digital marketers, ZeroGrok helps optimize images for faster loading times and better user experience.
Key Features
- Smart lossy & lossless compression
- Supports JPEG, PNG, WebP & AVIF
- Batch image processing
- Preserves PNG transparency
- No watermarks
- Secure processing
- API access for developers
Compression Results
- PNG: 50–80% size reduction
- JPEG: 40–75% size reduction
- Maintains sharp details
- Minimal visible quality loss
Best For
- Bloggers & content creators
- Web developers
- Online stores
- SEO-focused websites
Pricing
Free Plan: Limited compressions with standard features
ZeroGrok image compression stands out as one of the best image compression solutions for achieving maximum size reduction without compromising visual quality.
TinyPNG / TinyJPG
Website: tinypng.com & tinyjpg.com
Overview: TinyPNG is one of the most popular image compression services, trusted by millions of users worldwide. Despite its name, it handles JPEG, PNG, WebP, and AVIF formats with exceptional results.
Key Features:
- Smart lossy compression using advanced algorithms
- Batch processing up to 20 images simultaneously
- Preserves transparency in PNG files
- Maximum file size: 5MB per image
- No watermarks on compressed images
- API available for developers
- WordPress plugin for automated compression
- CDN integration for advanced users
Compression Results:
- PNG files: 50-80% size reduction
- JPEG files: 40-70% size reduction
- Maintains excellent visual quality
- Minimal visible artifacts
Best For: Bloggers, web developers, e-commerce sites, and anyone needing quick, reliable compression with consistent quality.
Pricing:
- Free: Up to 20 images at once
- Pro: $25/year for 500 compressions monthly
- API: Pay-as-you-go pricing
Squoosh (Google)
Website: squoosh.app
Overview: Developed by Google, Squoosh is an open-source image compression tool that processes images entirely in your browser, ensuring complete privacy and security.
Key Features:
- Browser-based processing (no server uploads)
- Real-time visual comparison slider
- Multiple format conversion options
- Advanced compression settings customization
- MozJPEG, WebP, AVIF, and more supported
- Detailed quality controls
- Completely free with no limits
- Mobile-friendly interface
Compression Results:
- Highly customizable compression ratios
- Side-by-side quality comparison
- Multiple encoder options for each format
- Excellent for experimentation
Best For: Users who want complete control over compression settings, privacy-conscious individuals, and those learning about image optimization.
Pricing: Completely free
ImageCompressor.com
Website: imagecompressor.com
Overview: ImageCompressor.com offers a clean, straightforward interface with support for multiple formats and batch processing capabilities.
Key Features:
- Supports JPEG, PNG, GIF, SVG, and WebP
- Batch compression up to 20 images
- Adjustable quality slider for customization
- Instant preview of compression results
- No registration required
- Fast processing speeds
- Download individual or zip all files
Compression Results:
- Quality slider from 1-100
- Average 60-80% file size reduction at quality 75
- Maintains good visual fidelity
- Visible compression artifacts at very low quality
Best For: Quick compression tasks, comparing different quality settings, and users who need flexibility.
Pricing: Free with some limitations on file size
Compressor.io
Website: compressor.io
Overview: Compressor.io provides both lossy and lossless compression options, giving users choice and flexibility based on their needs.
Key Features:
- Choose between lossy and lossless modes
- Supports JPEG, PNG, GIF, and SVG
- Single file processing focus
- Clear before/after file size comparison
- No registration needed
- Clean, minimal interface
- Fast compression processing
Compression Results:
- Lossy mode: 60-90% reduction
- Lossless mode: 10-20% reduction
- Side-by-side size comparison
- Download or save to cloud storage
Best For: Users who want to experiment with different compression methods on the same image.
Pricing: Free
ILoveIMG
Website: iloveimg.com
Overview: Part of the ILovePDF family, ILoveIMG offers comprehensive image editing tools including powerful compression features.
Key Features:
- Batch processing multiple images
- Supports JPG, PNG, GIF, and SVG
- Automatic optimal compression
- Additional editing tools (resize, crop, convert)
- Cloud storage integration (Dropbox, Google Drive)
- Desktop and mobile apps available
- Registered users get more features
Compression Results:
- Automatic quality optimization
- Good balance between size and quality
- Consistent results across batches
- Average 50-70% size reduction
Best For: Users who need multiple image editing features in one platform.
Pricing:
- Free: Limited features and files
- Premium: $6/month or $48/year
Optimizilla
Website: imagecompressor.com (Optimizilla)
Overview: Optimizilla emphasizes visual quality control, allowing users to compress up to 20 images while previewing each result.
Key Features:
- Compress up to 20 JPEG and PNG images
- Individual quality slider for each image
- Real-time preview of compression
- Zoom functionality for detail inspection
- Batch download as ZIP
- No file size limits
- No registration required
Compression Results:
- Customizable quality per image
- Average 70% size reduction at default settings
- Excellent for maintaining specific quality levels
- Visual feedback prevents over-compression
Best For: Users who want precise control over each image’s compression level.
Pricing: Completely free
ShortPixel
Website: shortpixel.com
Overview: ShortPixel offers advanced compression algorithms with lossy, glossy, and lossless options, plus extensive integration capabilities.
Key Features:
- Three compression levels: Lossy, Glossy, Lossless
- WebP and AVIF conversion
- Bulk folder compression
- WordPress, Shopify, and other CMS plugins
- API for developers
- CDN delivery options
- Automatic EXIF data removal
- Backup original images
Compression Results:
- Lossy: Up to 90% reduction
- Glossy: 50-70% reduction with better quality
- Lossless: 10-20% reduction
- Consistently high quality
Best For: Website owners, e-commerce businesses, and users needing automated workflows.
Pricing:
- Free: 100 images/month
- One-time credits: From $9.99
- Monthly plans: From $4.99/month
Gumlet
Website: gumlet.com
Overview: Gumlet combines image compression with a complete image optimization and CDN platform for professional use.
Key Features:
- Automatic format conversion (WebP, AVIF)
- Intelligent compression based on content
- Real-time image optimization
- Global CDN delivery
- Responsive image generation
- API and SDK integration
- Advanced analytics
- Quality controls
Compression Results:
- Context-aware compression algorithms
- Automatically serves best format to each user
- Average 60-80% size reduction
- Maintains excellent visual quality
Best For: Professional developers, SaaS companies, and high-traffic websites.
Pricing:
- Free tier available
- Paid plans from professional to enterprise
Step-by-Step Guide: How to Compress Images Online
Method 1: Using Zerogrok(Recommended for Beginners)
Step 1: Access Zerogrok Navigate to zerogrok.com in your web browser. The interface is clean and straightforward with a prominent upload area.
Step 2: Upload Your Images
- Click the upload area or drag and drop up to 20 images
- Supported formats: PNG, JPEG, WebP, AVIF
- Maximum file size: 5MB per image
- Files begin compressing automatically
Step 3: Wait for Compression
- Processing typically takes 5-30 seconds per batch
- Progress indicators show each image’s status
- Compression percentage displays for each file
Step 4: Download Compressed Images
- Click “Download” on individual images
- Or click “Download All” for ZIP file
- Compressed images retain original filenames with optional suffix
Pro Tips:
- Use the free WordPress plugin for automatic compression
Method 2: Using Squoosh for Maximum Control
Step 1: Open Squoosh Go to squoosh.app in any modern web browser. The application loads instantly and works offline.
Step 2: Upload Single Image
- Click to select or drag an image onto the interface
- Squoosh processes one image at a time
- All processing happens in your browser
Step 3: Choose Compression Settings
- Select output format (JPEG, WebP, AVIF, PNG, etc.)
- Adjust quality slider (recommended 75-85 for JPEG)
- Enable/disable advanced options
- Preview changes in real-time
Step 4: Compare Results
- Use the comparison slider to view before/after
- Check file size reduction in bottom corner
- Zoom in to inspect quality details
- Adjust settings if needed
Step 5: Download Optimized Image
- Click download icon in bottom right
- Image saves with original filename
- No metadata unless specifically preserved
Advanced Settings:
- Resize: Change dimensions while compressing
- Reduce palette: Optimize PNG color depth
- Encoder options: Fine-tune compression parameters
Method 3: Batch Compression with ILoveIMG
Step 1: Go to ILoveIMG Compress Tool Visit iloveimg.com/compress-image for dedicated compression access.
Step 2: Select Multiple Images
- Click “Select Images” button
- Choose multiple files simultaneously
- Or drag entire folders onto upload area
- Supports JPG, PNG, GIF, SVG
Step 3: Automatic Processing
- Tool automatically compresses all images
- Uses optimal settings for each format
- Processing completes in seconds
- Shows compression percentage for batch
Step 4: Download Results
- Download as single ZIP file
- Or download images individually
- Save directly to cloud storage
- Organize in folders
Additional Features:
- Resize images before or after compression
- Convert between formats
- Compress PDFs with images
- Edit images with other tools
Advanced Compression Techniques
Choosing the Right Quality Settings
For JPEG/JPG Images:
- Quality 90-100: Minimal compression, near-original quality (use for prints)
- Quality 75-85: Sweet spot for most web images (recommended)
- Quality 60-75: Acceptable for thumbnails and small images
- Quality Below 60: Visible degradation, use only when necessary
For PNG Images:
- 24-bit PNG: Full color with transparency support
- 8-bit PNG: Limited color palette, smaller files
- Reduce colors: Decrease color depth for simpler graphics
For WebP Images:
- Quality 80-90: Excellent balance of size and quality
- Quality 70-80: Good for most web applications
- Lossless WebP: For graphics requiring transparency
Format Conversion for Better Compression
When to Convert to WebP: Modern browsers support WebP, which offers 25-35% better compression than JPEG at the same quality level. Convert photographs and complex images to WebP for web use.
When to Convert to AVIF: AVIF provides even better compression than WebP (up to 50% smaller than JPEG) but has limited browser support. Use AVIF with fallbacks to JPEG or WebP.
When to Keep PNG: Maintain PNG format for logos, icons, graphics with transparency, screenshots with text, and images requiring lossless quality.
When to Use JPEG: JPEG remains ideal for photographs, complex images with gradients, images without transparency, and maximum compatibility across all platforms.
Responsive Image Strategy
Create Multiple Sizes: Generate several compressed versions of each image for different devices:
- Desktop: Full size (1920px wide)
- Tablet: Medium size (1024px wide)
- Mobile: Small size (640px wide)
- Thumbnail: Extra small (320px wide)
Metadata Removal
What is EXIF Data?
Digital cameras and smartphones embed metadata in images including camera settings, GPS location, date/time, and more. This data increases file size without adding visual value.
Tools for Metadata Removal:
- Most online compressors automatically strip EXIF data
- Squoosh offers option to preserve or remove metadata
- Privacy benefit: Removes location data from shared photos
When to Preserve Metadata:
- Professional photography archives
- Images requiring copyright information
- Photos needing camera settings documentation
Compression Best Practices by Use Case
E-commerce Product Images
Requirements:
- High visual quality to showcase products
- Fast loading for better conversion rates
- Consistent sizes for uniform display
- Multiple angles and zoom capability
Recommended Approach:
- Use lossy compression at quality 80-85
- Convert to WebP with JPEG fallback
- Create thumbnail (400x400px) and full-size (2000x2000px) versions
- Compress each size appropriately
- Average final size: 50-150KB per image
Blog Post Images
Requirements:
- Balance quality and page speed
- SEO-friendly file sizes
- Mobile-responsive sizing
- Featured images and inline graphics
Recommended Approach:
- Lossy compression at quality 75-80
- Maximum width: 1200-1920px
- Compress to under 200KB per image
- Use WebP with JPEG fallback
- Lazy loading for below-fold images
Photography Portfolio
Requirements:
- Maximum visual quality
- Showcase artistic vision
- Professional presentation
- Print-ready originals maintained
Recommended Approach:
- Lossless compression for originals
- High-quality lossy (90+) for web display
- Separate archive and web versions
- Watermarking for protection
- Use PNG for transparent backgrounds
Social Media Sharing
Requirements:
- Platform-specific size requirements
- Fast upload times
- Acceptable quality for screen viewing
- Multiple platform optimization
Recommended Approach:
- Lossy compression at quality 70-75
- Facebook: Max 2048px, under 500KB
- Instagram: 1080px square, under 1MB
- Twitter: 1200x675px, under 3MB
- LinkedIn: 1200x627px, optimized file size
Email Attachments
Requirements:
- Stay within size limits (typically 10-25MB)
- Quick sending and receiving
- Viewable quality on all devices
- Multiple images in single email
Recommended Approach:
- Aggressive lossy compression (quality 60-70)
- Resize to maximum 1024px width
- Aim for 100-300KB per image
- Use ZIP for multiple images
- Consider cloud links for large batches
Common Image Compression Mistakes to Avoid
Over-Compression
The Problem: Compressing images too aggressively creates visible artifacts, blocks, blurriness, and color banding that degrade user experience.
How to Avoid:
- Never use quality settings below 50 for JPEG
- Always preview compressed images at 100% zoom
- Test on actual devices before deploying
- Compare before/after versions carefully
Compressing Already-Compressed Images
The Problem: Re-compressing JPEG images compounds quality loss with each save, creating cumulative degradation.
How to Avoid:
- Always work from original, uncompressed files
- Save a master copy before any compression
- Use lossless formats for intermediate edits
- Only compress once for final delivery
Ignoring Image Dimensions
The Problem: Compressing oversized images wastes file size even after compression. A 4000x3000px image compressed to 200KB still loads slower than a properly sized 1200x900px image at 100KB.
How to Avoid:
- Resize images to display dimensions first
- Consider maximum screen resolutions
- Create responsive image sets
- Use appropriate dimensions for each use case
Not Testing Across Devices
The Problem: Images may look acceptable on high-resolution monitors but appear degraded on phones, tablets, or low-quality displays.
How to Avoid:
- Test compressed images on multiple devices
- Check on both mobile and desktop
- Verify quality at different zoom levels
- Get feedback from actual users
Neglecting Format Selection
The Problem: Using inappropriate formats wastes file size or sacrifices quality unnecessarily.
How to Avoid:
- Use JPEG for photographs
- Use PNG for graphics, logos, transparency
- Consider WebP for modern browsers
- Match format to content type
Measuring Compression Success
Key Metrics to Monitor
File Size Reduction:
- Aim for 50-80% reduction for most images
- Track average file sizes across site
- Monitor total image payload per page
Page Speed Scores:
- Google PageSpeed Insights
- GTmetrix
- WebPageTest
- Lighthouse audits
Core Web Vitals:
- Largest Contentful Paint (LCP): Target under 2.5s
- First Input Delay (FID): Target under 100ms
- Cumulative Layout Shift (CLS): Target under 0.1
Quality Assessment:
- Visual comparison tools
- User feedback and testing
- A/B testing different compression levels
- Monitor bounce rates and engagement
Tools for Testing
Google PageSpeed Insights: Free tool analyzing page performance and suggesting optimizations, including image compression recommendations.
GTmetrix: Comprehensive performance analysis with detailed image optimization suggestions and waterfall charts.
WebPageTest: Advanced testing with multiple locations, devices, and connection speeds for thorough compression validation.
Security and Privacy Considerations
Data Privacy
Browser-Based Tools (Like Squoosh):
- Images never leave your device
- Complete privacy guaranteed
- No server uploads
- Ideal for sensitive content
Server-Based Tools:
- Images uploaded to external servers
- Check privacy policies carefully
- Most delete files after processing
- Consider sensitivity of content
Best Practices:
- Use browser-based tools for confidential images
- Verify encryption (HTTPS) on all tools
- Read terms of service for commercial use
- Remove sensitive metadata before uploading
FAQs
Does compressing an image reduce quality?
Lossy compression does reduce quality, but when done correctly with quality settings around 75-85, the difference is imperceptible to most viewers.
What is the best image compression tool?
ZeroGrok image compression offers the best balance of ease-of-use, quality, and file size reduction for most users.
Can I compress images without losing quality?
Yes, using lossless compression methods.
How much should I compress images for websites?
Aim for file sizes under 200KB for most web images. Use quality settings of 75-85 for JPEG, which typically achieves 50-70% file size reduction while maintaining good visual quality.
What format is best for web images?
WebP offers the best compression with good quality for modern browsers,like zerogrok.com
Does image compression affect SEO?
Yes, positively. Faster-loading pages from optimized images improve Core Web Vitals scores, user experience, and search rankings. Google prioritizes sites with better performance.
Can I compress images on my phone?
Yes, many online compression tools work in mobile browsers.
How do I compress images in bulk?
Use online tools like Zerogrok, ILoveIMG, or ImageCompressor.com that support batch processing.
What’s the difference between compressing and resizing?
Resizing changes image dimensions (width and height in pixels). Compression reduces file size by optimizing data encoding.
Will compressing images speed up my website?
Absolutely. Optimized images directly improve page load times, reduce bandwidth usage, and enhance user experience.
Conclusion
Image compression is essential in today’s digital landscape for optimizing website performance and improving user experiences. Key recommendations include selecting the appropriate compression type lossy for web use and lossless for professional applications while using quality settings between 75-85 for JPEG images. Suggested tools include TinyPNG for simplicity and Squoosh for more control.
It’s crucial to preview compressed images before use, automate the compression process when possible, and monitor file sizes and page loading speeds. Staying updated with modern formats like WebP and AVIF can enhance efficiency. Ultimately, effective image compression balances file size reduction with visual quality, contributing to improved site rankings and user satisfaction.